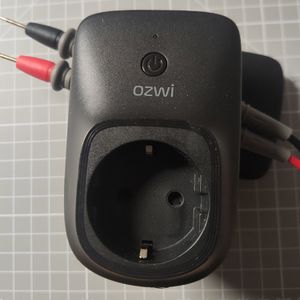
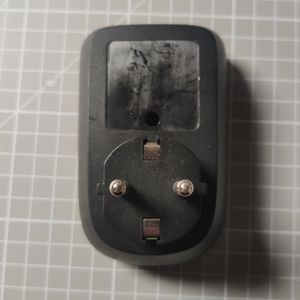
Description
This is a dirt cheap "smart" plug with ESP8266 inside. It's designed for 230V and 10A max current, but other regional versions exist.
It didn't have any identification or a sticker on it.
What's inside
There's an unknown ESP8266 module, YUANZE Y32F-SS-105HM Relay[1] and power supply components.
ESP8266 Board Pinout
Flashing custom firmware
You'll need to connect some kind of UART interface device to your PC or other capable device. RX pin of this device goes to board pin marked "U0 TX", TX pin -- to "U0 RX". GND to GND.
Connect GND and 3.3V pins from diagram above to 3.3V PSU (up to 0.2A was needed during my test).
Connect GPIO0 to GND and power on the device with PSU.
Flash the chip using ESPTool or other preferred method.
Remove the power and disconnect GPI0 tie to the ground.
Done!
Example ESPHome config
substitutions:
  display_name: "ozwi-plug"
  friendly_name: "ozwi Smart Plug"

esphome:
  name: "ozwi-plug"

esp8266:
  board: esp01_1m

# Enable logging
logger:

# Enable Home Assistant API
api:

ota:

wifi:
  ssid: !secret wifi_ssid
  password: !secret wifi_password
  on_connect:
      - light.turn_on: blue_led
  on_disconnect:
      - light.turn_off: blue_led
  ap:
    ssid: "${display_name} Fallback Hotspot"
    password: !secret wifi_AP_password
    ap_timeout: 3min

captive_portal:

output:
  - platform: gpio
    pin: GPIO4
    inverted: False
    id: red_led_gpio
  - platform: gpio
    pin: GPIO14
    inverted: False
    id: blue_led_gpio
  - platform: gpio
    pin:
      number: GPIO12
      inverted: false
    id: relay1

binary_sensor:
  - platform: gpio
    internal: true
    pin:
      number: GPIO13
      mode: INPUT_PULLUP
      inverted: true
    name: ${display_name} Switch
    on_press:
      - switch.toggle: load

light:
  - platform: binary
    name: "Red LED"
    id: red_led
    internal: true
    output: red_led_gpio
  - platform: binary
    name: "Blue LED"
    id: blue_led
    internal: true
    output: blue_led_gpio

switch:
  - platform: output
    name: ${friendly_name} Load
    id: load
    # internal: true
    output: relay1
    on_turn_on:
      - light.turn_on: red_led
    on_turn_off:
      - light.turn_off: red_led

