Uncategorized files
Jump to navigation
Jump to search
Showing below up to 50 results in range #21 to #70.
View (previous 50 | next 50) (20 | 50 | 100 | 250 | 500)
 Almost10W.jpg 4,510 × 2,381; 2.33 MB
 Amscope.JPG 2,000 × 1,239; 676 KB
 Austin energy.txt ; 991 KB
 BDEW UTILMD PID.png 945 × 95; 45 KB
 BG International Decapsulator Model 250.png 2,650 × 2,012; 5.55 MB
 BG Model 250 Controller Back.jpeg 3,856 × 2,172; 2.35 MB
 BG Model 250 Controller Backplane Bottom.jpeg 2,214 × 3,389; 2.73 MB
 BG Model 250 Controller Backplane Top.jpeg 2,282 × 3,566; 3.07 MB
 BG Model 250 Controller Control Panel PCB.jpeg 4,032 × 3,024; 2.63 MB
 BG Model 250 Controller Front.jpg 3,633 × 2,162; 2.19 MB
 BG Model 250 Controller IO Board Back.jpeg 3,862 × 1,994; 2.99 MB
 BG Model 250 Controller IO Board Front.jpeg 3,805 × 1,836; 2.72 MB
 BG Model 250 Controller IO Board IC.jpeg 2,706 × 2,429; 1.93 MB
 BG Model 250 Controller IO Board Transistor.jpeg 1,293 × 967; 345 KB
 BG Model 250 Controller IO Board Transistor2.jpeg 1,073 × 872; 264 KB
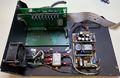 BG Model 250 Controller Internal 1.jpeg 3,837 × 2,482; 3.33 MB
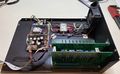 BG Model 250 Controller Internal 2.jpeg 3,852 × 2,369; 2.83 MB
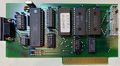 BG Model 250 Controller Processor Board.jpeg 3,818 × 2,097; 2.63 MB
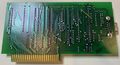 BG Model 250 Controller Processor Board Back.jpeg 3,688 × 1,996; 2.84 MB
 BG Model 250 Front.JPG 3,840 × 2,160; 3.87 MB
 BG Model 250 Rear.JPG 4,592 × 3,448; 5.68 MB
 BG Model 250 Side 1.JPG 3,840 × 2,160; 4.41 MB
 BG Model 250 Side 1 Top.JPG 4,592 × 3,448; 5.78 MB
 BG Model 250 Side 1 Vent Valve.JPG 4,592 × 3,448; 5.86 MB
 BG Model 250 Side 2.JPG 3,840 × 2,160; 4.67 MB
 BG Model 250 Side 2 Cylinder.JPG 4,592 × 3,448; 5.73 MB
 BG Model 250 Side 2 Cylinder Valve.JPG 4,592 × 3,448; 5.67 MB
 BG Model 250 Side 2 Valve.JPG 4,592 × 3,448; 6.46 MB
 BG Model 250 Top Chamber.JPG 4,592 × 3,448; 6.15 MB
 BG Model 250 Top Regulators.JPG 4,592 × 3,448; 5.79 MB
 Back laid flat pager.jpg 4,032 × 2,268; 1.7 MB
 Back pager.jpg 1,560 × 878; 499 KB
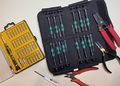 Basic Tools.jpg 3,897 × 2,781; 4.09 MB
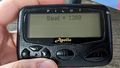 Baud menu.jpg 4,032 × 2,268; 1.7 MB
 Bearing Motor-side.jpg 5,184 × 3,456; 1.64 MB
 Belt Shield-top.jpg 2,374 × 2,576; 1.63 MB
 BigSpoon.JPG 2,000 × 1,286; 708 KB
 Blink syncmodule2 photo1.jpg 1,728 × 1,728; 778 KB
 Bottom layer zoom.jpg 5,776 × 5,824; 19.38 MB
 Bst-y22.jpg 5,824 × 843; 2.75 MB
 Bst-y23.jpg 6,016 × 827; 2.7 MB
 C-mount-spacer.JPG 1,464 × 1,040; 361 KB
 CAD View.zip ; 688 KB
 CLS-HAN.png 736 × 540; 210 KB
 Camera focus.JPG 2,140 × 1,640; 1.06 MB
 Canon-powershot-g9.jpg 355 × 241; 14 KB
 Canon PowerShot A3100 IS.jpg 369 × 307; 39 KB
 Canon PowerShot A3100 IS Main Back.jpg 2,064 × 1,753; 738 KB
 Canon PowerShot A3100 IS Main Front.jpg 2,039 × 1,705; 788 KB
 Canon PowerShot A3100 IS buttons back.jpg 2,595 × 854; 351 KB


